This section contains the necessary steps to start working with the RTU-X.
¶ Powering the RTU-X
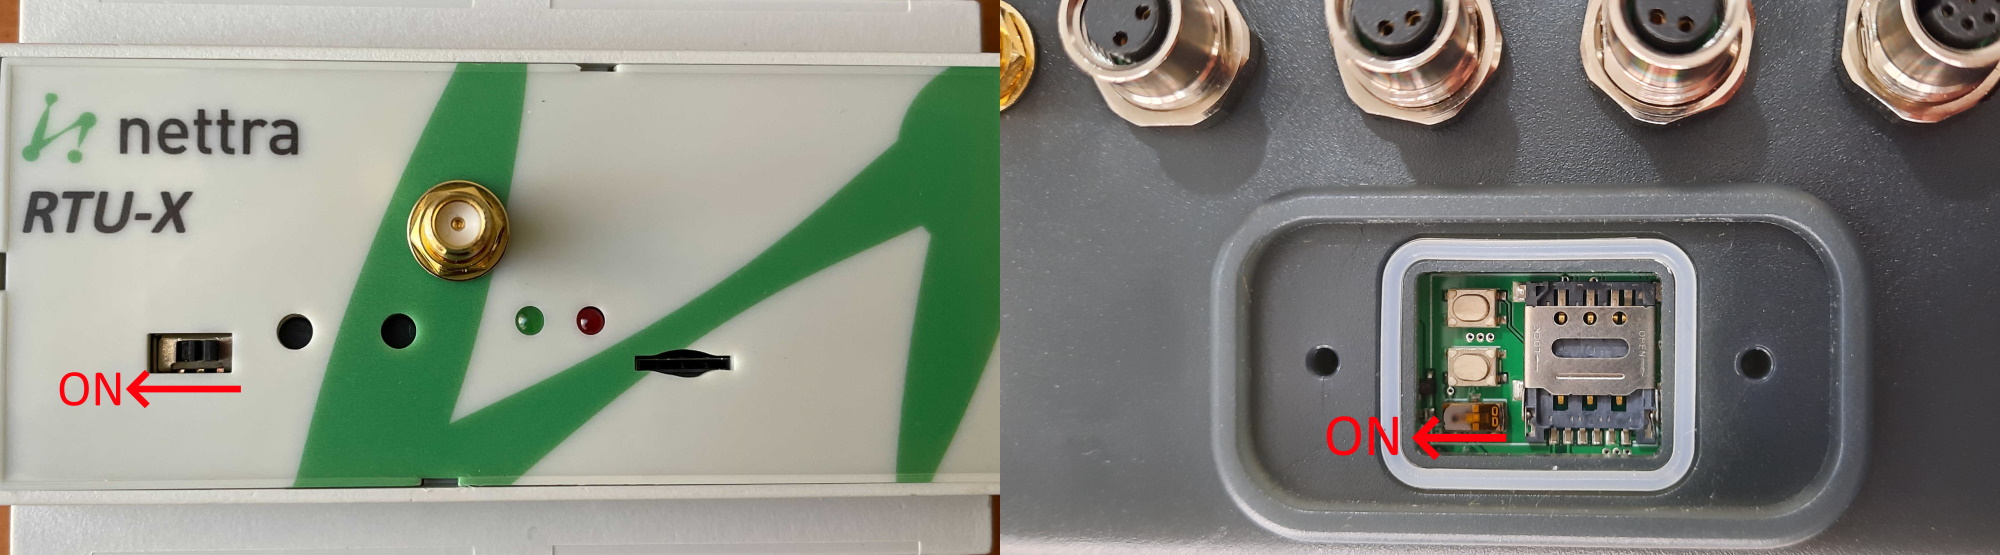
To turn on the RTU-X, you must activate the power switch. The switch location depends on the RTU-X model as shown in the following pictures:
If the RTU-X battery has enough charge, the green led should turn on.
If the RTU-X battery is not charged, you will need to connect the external power supply to turn it on and charge the battery. In order to to this, you will need to connect VDC and GND with 8-30VDC (for the VDC model) or L and N with 110-220VAC (for the VAC model), as described in the physical connections section.
¶ Configuration tools
There are to way to connect and configure the device
- Using a web browser, connecting to the web server embedded in the RTU-X. In this case, it only requires a PC or mobile device with a web browser (Chrome, Firefox, Microsoft Edge, etc.).
- Using the Windows user interface available for download at Downloads.
Both options allow you to configure all the RTU-X parameters, with the exception of the script. The script can only be configured using the user interface for Windows.
¶ Connecting to the RTU-X
By default, the RTU-X generates a wifi access point with the name RTU-X-YYYYYY, where YYYYYY are the last 3 bytes of the MAC of the RTU-X. The network is open (no password) by default.
By connecting to this network, you will be able to access the RTU-X at the IP address 192.168.4.1.
If you are using the web browser, you will be prompted for a password when connecting to the device. The default password is empty, so just press Login. That password can be later changed to add an additional access security level to the RTU-X.